Friday, February 7, 2025

How Often Should You Perform Log Home Maintenance?


Log homes are beautiful and durable, but they require regular maintenance to stay in top condition. Without proper upkeep, issues like moisture damage, rot, and insect infestations can develop, leading to costly repairs. To protect your investment and keep your log home looking its best, it’s important to follow a maintenance schedule. Some tasks need to be done yearly, while others only require attention every few years. This guide will help you understand what needs to be done and how often to do it to keep your log home in peak condition. Yearly Log Home Maintenance Tasks Cleaning and Pressure Washing Dirt, pollen, mildew, and other contaminants can build up on your logs, leading to discoloration and potential moisture retention. Washing your home yearly helps prevent long-term staining and decay. Best time: Spring and Fall Frequency: Twice per year Tip: Avoid damaging the logs by using a low-pressure wash with a mild wood cleaner. Inspecting for Damage Regular inspections help catch minor issues before they become significant problems. Look for cracks, checks, moisture intrusion, log rot, and insect activity around the exterior of your cabin. Best time: Spring and Fall Frequency: At least once per year, but preferably twice Tip: Pay close attention to log ends, window and door frames, and any areas near the foundation or without regular sunlight, such as shaded areas or the north wall. Chinking and Caulking Checks Chinking and caulking prevent air and moisture from penetrating your home. Over time, they can shrink or crack, allowing water and pests inside. Best time: Spring and Fall Frequency: Once per year, touch up as needed Tip: Use a high-quality, flexible sealant compatible with your logs and climate. Pay special attention to cracks that can hold standing water. Log Home Maintenance Tasks for Every 2-3 Years Staining and Sealing Stain protects logs from UV damage and moisture. Depending on climate and exposure, reapplication may be needed more often. Best time: Late Spring to Early Fall Frequency: Every 2-3 years Tip: Check if water beads up or absorbs into the logs. If it absorbs quickly, it’s time to reapply stain. Every 3-5 Years Log Repairs and Replacement To maintain structural integrity, logs showing rot, deep cracking, or insect damage should be repaired or replaced. Best time: Whenever necessary, ideally in dry weather Frequency: As needed, but logs should be assessed every 3-5 years Tip: Use borate treatments to help prevent future rot and insect damage. Gutter and Drainage Maintenance Proper drainage keeps water away from your home’s logs, reducing the risk of moisture damage. Best time: Spring and Fall Frequency: Every 3-5 years for replacement; cleaned at least twice per year Tip: Extend downspouts away from the home to prevent water pooling near the foundation. As Needed or Special Considerations Pest Control Treatment Wood-boring insects like termites, borer beetles, carpenter ants, and carpenter bees can cause severe damage to logs. Applying borate treatments can help prevent infestations. Frequency: As needed, depending on pest activity and climate Tip: Keep firewood and mulch away from the home to deter pests. Roof and Flashing Inspection A well-maintained roof prevents leaks that could cause log rot. Frequency: Yearly, or after major storms Tip: Ensure all flashing is secure and gutters are directing water away properly. Foundation and Landscaping Maintenance Keeping plants, soil, and mulch away from logs helps prevent moisture buildup. You should also keep an eye on log home settling as it can create additional problems over time. Frequency: Ongoing monitoring, adjust seasonally Tip: Maintain at least a 12-inch clearance between landscaping and logs. Is it Time for Maintenance or Restoration? Log home maintenance doesn’t have to be overwhelming. Following a regular schedule can prevent small issues from turning into costly repairs. Keeping track of completed maintenance tasks in a log or journal can help you stay organized. If you’re unsure about any aspect of log home maintenance, Log Masters is here to help. We offer maintenance plans to help ensure your cabin stays pristine for decades. However, if you’re looking at this list and thinking, “I haven’t maintained any of this as recommended,” that’s okay, too. Just walk through our simple restoration checklist, then contact us with details on what your home needs so we can provide an accurate restoration estimate. The post How Often Should You Perform Log Home Maintenance? appeared first on Log Home Restoration, Maintenance & Additions | Log Masters.

Via https://logmastersrestorations.com/blog/how-often-should-you-perform-log-home-maintenance/


source https://johnkbrown90.weebly.com/blog/how-often-should-you-perform-log-home-maintenance

Thursday, February 6, 2025

Checking for Log Rot and Insect Infestation: A Guide for Log Homeowners


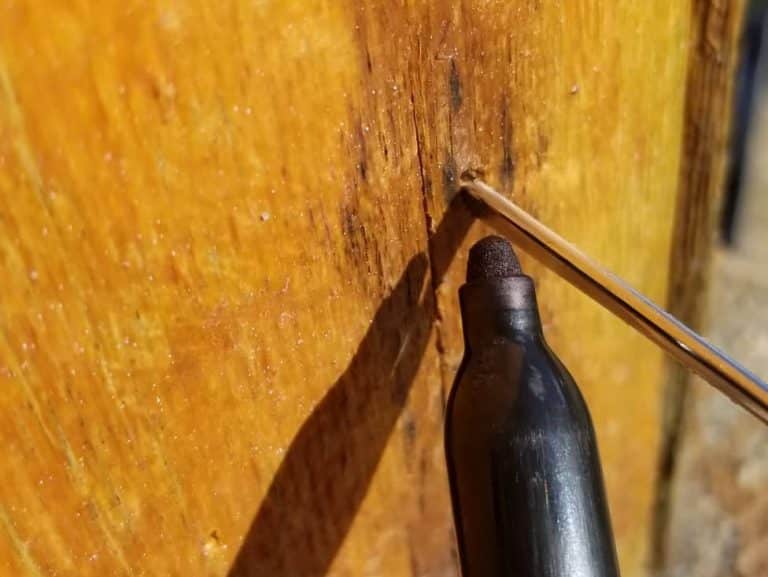
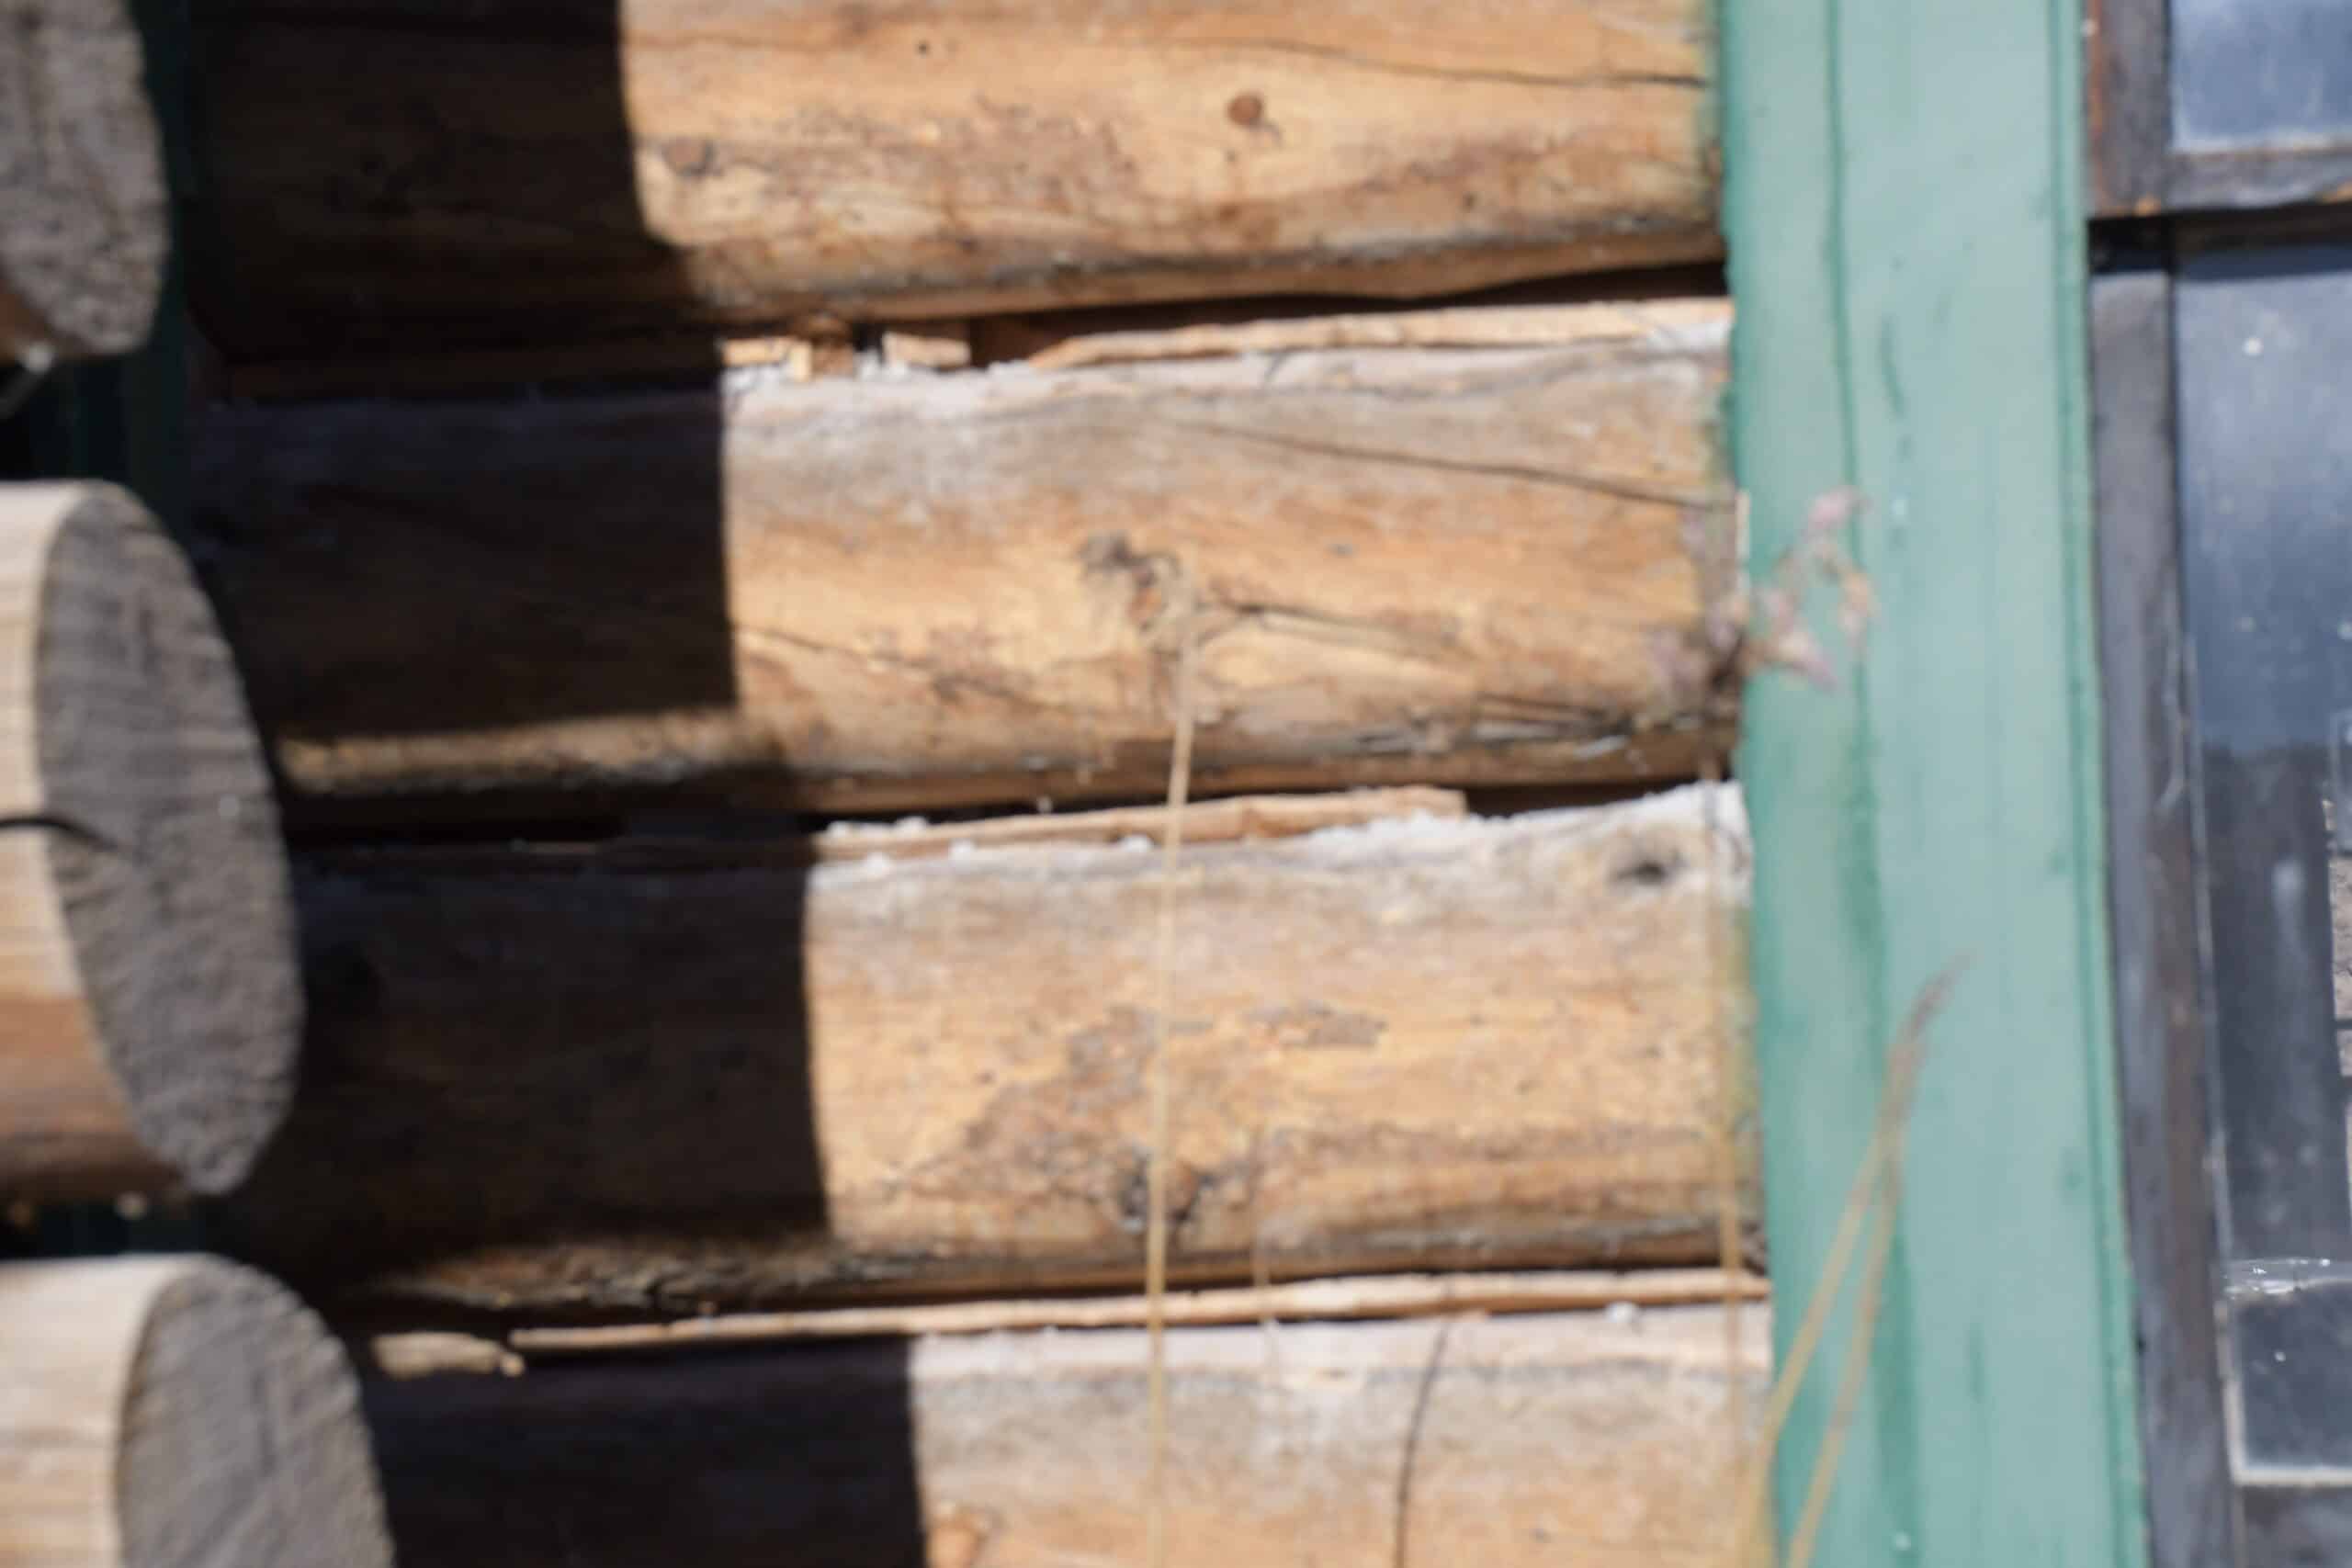
Log homes are known for their charm and durability but require ongoing maintenance to stay in top condition. Two of the biggest threats to log homes are log rot and insect infestations. If left unchecked, these issues can weaken the structure of your home, leading to costly repairs. Understanding what causes log rot, how to identify it, and which insects pose the greatest risk will help you protect your investment. This guide will walk you through everything you need to know about checking for log rot and insect infestations—before they become serious problems. What is Log Rot? Log rot occurs when fungi break down the wood fibers, causing logs to soften, crumble, and lose their structural integrity. The primary cause of log rot is excess moisture, which creates the perfect environment for fungal growth. Without proper drainage, sealing, and maintenance, even the highest-quality logs can become vulnerable to decay. Types of Log Rot Log rot can take different forms, and all log homeowners need to familiarize themselves with the types of log rot that can occur. Typically, log rot can be classified into two main types: brown and white. Brown Rot Also known as “dry rot,” brown rot primarily attacks the cellulose in wood, causing it to shrink and crack into cube-like fragments. Affected logs may appear darker and feel brittle, breaking apart easily. Despite its nickname, brown rot requires moisture to develop but can continue spreading even in drier conditions once established. White Rot White rot affects both the cellulose and lignin in wood, leading to a spongy, fibrous texture. Logs with white rot often appear lighter in color, with a whitish or yellowish tint. Unlike brown rot, white rot tends to maintain the wood’s structural shape for longer, but it still weakens the log over time. What are the Long-Term Impacts of Log Rot? If left untreated, log rot can have serious consequences: Structural Weakening – Rot compromises the strength of logs, leading to sagging walls, unstable support beams, and even structural failure. Increased Pest Activity – Damaged wood attracts insects such as termites, carpenter ants, and beetles, further accelerating deterioration. Higher Repair Costs – Minor rot issues can often be repaired, but extensive rot may require full log replacement, which is costly and time-consuming. Moisture and Mold Problems – Log rot often goes hand-in-hand with mold and mildew, which can impact indoor air quality and create health concerns. How Can I Check for Log Rot? Routine inspections are crucial for catching log rot early. Here are the best methods for checking your logs: Visual Inspection – Look for discoloration, cracks, peeling finishes, or soft spots. Pay close attention to areas where moisture tends to accumulate. Probe Test – Use a screwdriver or skewer to poke the logs. If the wood feels soft, crumbles, or allows the probe to sink in easily, rot may be present. Tap Test – Tap the logs with a hammer or screwdriver handle. Solid wood produces a sharp sound, while rotted areas will sound hollow. Moisture Meter Test – A moisture meter can detect excessive moisture levels in logs, helping you identify potential problem areas before rot starts. Check High-Risk Areas – Log ends, window and door frames, roof overhangs, and foundation areas are particularly vulnerable to rot. The Probe Test: Our Recommendation The easiest way to check for log rot is to take the skewer and poke the logs. If the skewer sinks in, you can measure how far it sinks in. Hopefully, the skewer does not sink in anywhere. The best-case scenario is that it only sinks in less than a centimeter or quarter of an inch beyond the point. However, if it sinks in further than that, it is worth getting an accurate estimate. People sometimes use a paint roller frame on a pole to reach high spots. You can also use a screwdriver if you don’t have a skewer. What Insects Typically Attack Log Homes? Wood-destroying insects can cause as much damage as log rot—sometimes even more. Here are the most common culprits: Carpenter Ants Carpenter ants don’t eat wood, but they tunnel through it to create nesting galleries. They often target moist or rotting wood, making log homes susceptible, especially if rot is already present. Signs include wood shavings (frass), rustling sounds inside walls, and large black ants near logs. Termites Termites are among the most destructive pests for log homes. They feed on wood 24/7 and often go undetected until significant damage has occurred. Signs of a termite infestation include mud tubes along logs, discarded wings, and hollow-sounding wood. Carpenter Bees Carpenter bees bore perfectly round holes into logs to lay their eggs. Over time, their activity weakens the wood, and their tunnels can attract woodpeckers, which cause additional damage. Look for small, round entry holes and sawdust piles beneath logs. Powder Post Beetles These beetles lay their eggs in cracks or untreated wood surfaces, and the larvae tunnel through the wood, creating tiny holes and powdery sawdust (frass). Infestations can remain active for years if left untreated. Cluster Flies While not wood-destroying, cluster flies seek shelter in log homes during cooler months. Their presence indicates gaps or cracks in logs that need sealing. Long-horned Beetles These beetles lay eggs in dead or decaying wood, and the larvae tunnel through the logs, weakening the structure over time. Their exit holes are larger than those of powder post beetles. The Old House Borer Beetle (Hylotrupes bajulus) is a long-horned beetle commonly found in log homes. Unlike long-horned beetles that prefer freshly cut or live wood, the Old House Borer targets dry, seasoned softwood, making log homes particularly vulnerable. Their larvae can remain hidden within the wood for years, tunneling and weakening structural integrity before emerging as adults. Side Note: A key distinction between the Old House Borer and Powderpost Beetles is their antennae—long-horned beetles have noticeably long antennae, while Powderpost Beetles have short, stubby ones. Identifying these differences helps determine the best treatment and prevention methods. What are the Signs of Insect Infestation? Detecting an insect infestation early can prevent significant damage. Look for these warning signs: Small, round exit holes – A sign of wood-boring beetles or carpenter bees. Sawdust or frass piles – Indicates active insect activity. Hollow-sounding wood – Could signal termites or internal beetle damage. Mud tubes on logs – A common sign of subterranean termites. Ant trails or swarming insects – May indicate carpenter ants or termites. Buzzing or rustling sounds – Could suggest carpenter ants or bees inside logs. If you notice any of these signs, consult a log home specialist or pest control expert immediately. How to Prevent Log Rot and Insect Infestations Preventative maintenance is key to keeping your log home safe from rot and pests. Here’s how you can protect your home: Moisture Control Maintain a properly sealed and finished exterior to prevent water intrusion. Keep gutters clean and functional to direct water away from logs. Ensure adequate roof overhangs and drainage to minimize splashback. Routine Inspections Inspect logs seasonally for cracks, discoloration, or soft spots. Use a moisture meter to monitor potential problem areas. Pest Prevention Keep firewood and mulch away from your home to deter termites and ants. Seal gaps, cracks, and entry points to prevent insects from nesting. Treat logs with borate-based preservatives to deter wood-boring pests. Prompt Repairs Address small cracks and rot early before they worsen. Replace severely damaged logs to prevent structural weakening. Don’t Wait Until It’s Too Late: Protect Your Home Today! Log rot and insect infestations can cause serious damage if left unchecked, but regular maintenance and early detection can help protect your home for years to come. By understanding the warning signs and taking preventative steps, you can enjoy the beauty and durability of your log home without worry. If you suspect log rot or insect activity, contact Log Masters to assess the situation and recommend the best course of action. Staying proactive will save you time, money, and stress in the long run! The post Checking for Log Rot and Insect Infestation: A Guide for Log Homeowners appeared first on Log Home Restoration, Maintenance & Additions | Log Masters.

Via https://logmastersrestorations.com/blog/checking-for-log-rot-and-insect-infestation-a-guide-for-log-homeowners/


source https://johnkbrown90.weebly.com/blog/checking-for-log-rot-and-insect-infestation-a-guide-for-log-homeowners

Wednesday, February 5, 2025

How Do You Fill Gaps in Wood Before Staining? A Complete Guide


If you own a log home, you have log gaps. These spaces or separations form between the logs of a log home over time. These gaps can occur for several reasons, including natural settling, wood shrinkage, temperature and humidity fluctuations, or improper construction techniques. There are different kinds of log gaps and ways to fill them. Leaving gaps unfilled or filling them incorrectly can lead to a variety of issues, and no one wants that! At Log Masters, we recommend regular inspections and maintenance to ensure a tight, energy-efficient, and well-protected log home. However, if you notice gaps in the logs of your home, this comprehensive guide will explain everything you need to do to fill these gaps before staining so you can properly maintain your cabin. What are Log Gaps? Log gaps are spaces or separations that can form between the logs of a log home over time. These gaps can occur for several reasons, including natural settling, wood shrinkage, temperature and humidity fluctuations, or improper construction techniques. If left unaddressed, log gaps can lead to various issues such as: Energy inefficiency: Air leaks through gaps, causing drafts and higher heating or cooling costs. Moisture intrusion: Gaps allow water to seep in, leading to wood rot, mold growth, and structural damage. Pest infestations: Small openings can become entry points for insects and rodents. Aesthetic concerns: Visible gaps can diminish the visual appeal of the log structure. To prevent and address log gaps, homeowners can use materials like chinking (a flexible, textured sealant), caulking, or backer rods to fill and seal the spaces. Regular inspections and maintenance are key to ensuring a tight, energy-efficient, and well-protected log home. Types of Log Gaps Each cabin log is unique, and depending on how it is built, log gaps can vary in size and shape. Log home professionals like Log Masters label log gaps as one of three types: large, small, and everything in between. Synthetic log home caulking products and backer rods can quickly fix small gaps. However, significant gaps take a little more time and extra work than smaller ones. Small Gaps Small gaps often look paper-thin and measure less than one inch wide or deep. Examples include log joints, door and window frames, and checks and cracks. Caulking alone is typically sufficient for these gaps. However, some professionals prefer to use backer rods for added protection and a more uniform seal. Large Gaps Large gaps measure over one inch in width or depth. These larger log gaps often require additional support before applying chinking or caulking. This support typically comes in the form of a backer rod or grip strip, which helps fill the void and provides a base for the sealant. Everything In Between Gaps between large and small require a case-by-case approach, balancing the need for structural support and aesthetic appeal. In some cases, small gaps that only require caulking can be made to look larger to achieve a more traditional or visually appealing log home style. How to Fill in Log Gaps Step 1: Clean the Area Ensure the gap is free from rot debris and any other foreign objects. Step 2: Insert Backing Determine if you will insert Backer Rods for small gaps or Grip Strips for large gaps and everything in between. Step 3: Apply Synthetic Caulking or Chinking Smooth it out with a moistened putty knife for a seamless finish. Step 4: Clean Up With a damp wash cloth, remove any excess before it cures. Step 5: Let It Cure Allow the material to dry completely before staining per recommended dwell time. Other Gaps to Fill The information above primarily applies to filling gaps between logs on the exterior of your home. However, there are instances where your interior log joinery may need to be filled. The following video shows you precession caulking methods that can be used for other locations around your log home, including the cabin’s interior. Need Help with Log Gaps? Call a Log Master Today! Regular maintenance schedules are essential for log homes where weather and insects pose significant risks. Using proper caulking and chinking applications and by staying proactive, you log home sealant will rarely need full replacement. Whether restoring or maintaining a treasured retreat, Log Masters Restorations is here to help. Explore our blogs for more tips and insights, and contact us today for a free estimate. We have more homes to share, such as a cabin transformation in Saguache, Colorado, Defiance, Missouri, and Pacific, Missouri.   Frequently Asked Questions About Log Gaps Should I stain before installing backer rod or grip strip? Some will say either, but ideally you should stain before installing backer rod or grip strip. Here’s why: Complete Coverage: Staining before installing the backer rod or grip strip ensures that the stain penetrates all exposed wood surfaces, including the edges of gaps. This protects the wood beneath and around the backer material from weathering and UV damage. Avoid Stain Contamination: If you stain after installing backer rod or grip strip, the stain may soak into or adhere to the backer material, compromising the sealant’s bond or appearance. Easier Cleanup: Staining first prevents accidental smearing of stain onto the sealant or backer rod, reducing cleanup and ensuring a neat finish. Sealant Adhesion: Proper sealant application relies on a clean surface. Staining after installing backer rod may create a barrier or residue that could hinder the sealant’s adhesion. By following this sequence, you’ll achieve better protection, durability, and aesthetics for your log home. Can I stain directly after filling gaps? No, allow the caulking or chinking to cure completely first. What materials should I avoid? Avoid non-stainable fillers or low-quality products not intended for log homes. Do I have to stain before or after caulking? You can do either as most log home stains and caulking bound well together despite order of application, but always check the product directions. Explore More Log Home Maintenance Tips Filling gaps in your log home is just one part of keeping it in great condition. For more expert advice, check out our blog articles: 3 Essential Tips for Log Home Maintenance How to Save Your Log Home’s Appearance Log Cabin Chinking: Why It’s Essential Log Cabin Caulking: Enhancing Protection and Longevity We’re here to help you maintain and restore your log home with professional services and practical advice. Ready to get started? Contact us today for a free consultation! The post How Do You Fill Gaps in Wood Before Staining? A Complete Guide appeared first on Log Home Restoration, Maintenance & Additions | Log Masters.

Via https://logmastersrestorations.com/blog/how-do-you-fill-gaps-in-wood-before-staining-a-complete-guide/


source https://johnkbrown90.weebly.com/blog/how-do-you-fill-gaps-in-wood-before-staining-a-complete-guide

Friday, January 17, 2025

What Are The Considerations for Log Home Restoration Estimates?


Most experienced log homeowners have a basic understanding of what log home maintenance entails. However, many do not realize all of the factors that go into a log home restoration estimate. When we quote a restoration or maintenance job, we must not only walk through our log home maintenance checklist to determine what work is necessary but also consider travel and equipment requirements, the style of log home we are working on, and the home’s maintenance history. If you have questions about all of the factors we consider in a log home estimate, you’re in luck because we have all the answers! By the time you read this post, you will also have this Log Master knowledge at your disposal. Basic Information Needed to Start Your Restoration Estimate When homeowners call our toll-free number, we will ask for the basic information most service providers need to begin a project. This includes: First and last name Phone number and email address The physical address of the cabin The square footage of your log home What prompted you to call? It seems normal, but some prefer to keep out their phone number or physical location out of fear. Rest assured, we do not share information collected or sell our client list. We hate it when companies do it to us, so to avoid hypocrisy and show respect for our clients, we refuse to participate in selling our client list. Whatever you share stays in-house for in-house use only. After we collect this basic information, we will ask you to send us photographs of your log home. Log Home Photos: A Necessity for Online Estimates They say a picture is worth a thousand words, and this could not be truer when providing a log home restoration estimate. These images give us an idea of the log home’s condition and help us determine the cabin’s floor plan, the land surrounding the home, and any obstacles we may need to work around. In many cases, it’s easier for us (and for you) if we can see the log home. This is because it’s hard to verbalize certain types of damage or areas of concern. List of Suggested Pictures This list of suggested log home photographs ensures your log home’s needs are effectively communicated. Please keep in mind this list is not exhaustive, and we may request additional photos for more context. To start, we suggest you take pictures of the following environmental obstacles: A house over a lake or water Road access problems Power lines that are attached to the log cabin Your windows and door frames (common areas for log rot or insect damage) Facia and nearby logs Logs near the ground (especially if the log height is less than one foot above the ground) Areas of regular shade (you will often see a green hue on these logs) West and south-facing walls (they get the most rain) East and north-facing walls (especially if your location makes it difficult for them to dry out) Decks (if you want it included in your estimate) Posts or columns on the front or back porches Any cracks, bubbling, or weathered chinking and finishing Extended horizontal checks (cracks) in the logs that may hold rain (typically on the top of a log) Signs of insects Other areas that would benefit from an expert eye Guidelines for Precise Pictures You can use a phone or camera to photograph the items mentioned above. The device does not matter; it’s the precision we care about in order to make an accurate repair or restoration estimate. This avoids inaccurate estimates or change orders once we arrive and begin the work. For areas of concern that include cracks, log rot, or other blemishes, we recommend using a ruler, tape measure, quarter, or soda to provide perspective within the images. Also, it helps if you can take multiple shots from different angles of potential log rot, insect damage, caulk or chink separation, and cracked or missing finishes. If you need clarification, please call us so we can assist you. Primary Factors Impacting Your Restoration Estimate One of the best things about log homes is most of them are unique. However, this means that we can’t provide cookie-cutter restoration estimates. We must evaluate each home with fresh eyes and assess what is needed. With your photos, we can accurately assess your log home’s needs. We may recommend the products and services listed below based on what we see. We love sharing our expertise to educate our clients on how the types of logs, caulk or chink, log rot or insect damage, and issues with clear finishes impact our log home repair estimate.  1. Type of Log Home Exterior What makes a log home a log home? The exterior and interior? Is it based on appearance or structural makeup? Depending upon who you ask, opinions on what qualifies as a log home vary. Big or small, there are two types of cabins: log-sided and log-built. Log Sided Homes Log-sided homes can look just as beautiful as a log cabin. This “log home look” is budget-conscious but requires regular maintenance, just like any other log home. We can replace pieces with log-sided homes if they are rotted without impacting the structural integrity. However, we must also take certain precautions to avoid damage to interior walls.  Additionally, log-sided homes are still log homes, meaning they must be regularly stained. Stain protects the wood from water and other elements while preserving its natural beauty.  We may ask additional questions about the type of log siding used on your home to provide the most accurate restoration estimate. Log-Built Homes There are a variety of styles for log-built homes, both in terms of log style and log species. These homes can be made from a variety of trees, including fir, cedar, pine, oak, and cypress. Furthermore, log homes can be built in different ways, such as full scribe, post and beam, timber frame, and more. These decisions are often made based on personal preferences and functionality, but they are also variables that can impact the cost of log home restorations and repairs. 2. Log Styles It’s also important for us to know the type (or types) of log style used to construct your cabin. Knowing your type of log style is generally easy to tell from pictures. However, your home may have multiple kinds of logs or styles of logs and log siding or a combination. It is not unheard of to discover part of the cabin was made with Douglas fir logs in a specific style and an addition to the home done in cedar logs of a different style and log siding around the foundation. Log styles can go a step further when considering the exterior log surface, joints, corners, and ends. Each of these also contributes to factors drastically impacting the time needed to fix log rot in a given area. Some log rot is only a foot or two in length. To save money, rather than order a complete log in that style, a skilled log master may cut/mill another log on the site. 3. Chink and Caulk Log homes typically use caulk or chink between the logs as a barrier from the elements and to protect the logs from water damage. The main difference between the two is elasticity and texture. Chink is more commonly used for large gaps between logs and is sometimes two inches wide, while caulk is used for smaller or tight gaps. Mortar vs. Synthetic Chink Two types of chinking are typically used in log homes: mortar and synthetic. Each has its pros and cons, and both can impact your log home repair estimate. Mortar chinking is a concrete-like substance that is generally cheaper and around 10% of the price of synthetic chinking. However, mortar can crack and break down as the house settles, allowing moisture between the logs. Also, mortar chinking can be more challenging to remove, especially if trapped moisture causes log rot. Nowadays, chink is made from synthetic material to allow for more elasticity to combat the seasons when the logs shrink and expand. Although the initial cost can be more expensive, it is far more durable and likely to prevent costly repairs in the future. Caulking Caulk is almost always used around windows and doors or small tight joints on log homes. It has a higher elasticity than chink but often lacks textures. Likewise, it comes in a few colors to match the stain, chink, making it nearly invisible to the naked eye. It is also much easier to apply than chinking, meaning less time spent restoring your home. Less time often equals lower costs. 4. Log Rot and Insects Customers often call us for restoration estimates because they have noticed areas of concern on the exterior of their homes. Both log rot and insect infestation can cause extreme damage and represent the bulk of the estimated costs. Log rot is at the top of most log cabin homeowners’ concerns. You may have noticed black behind the finish or chunky pieces falling away. These could be signs of log rot or a poor finish. Often, log rot occurs due to the homeowner’s inability to keep up with regular maintenance or their inability to heed the recommended care instructions of the log home builder. Unfortunately, since most types of log rot require us to replace the affected logs, it is a major consideration for log home restoration estimates. Insect damage comes in as a close second for homeowner concerns, as most types of insect infestations are highly visible. Although insect damage doesn’t always require us to completely replace logs, it does involve a series of removal and repair steps before we can re-stain the logs. 5. Damage From Previous Restoration Projects Given current prices for home construction materials, we know it is tempting to hire a friend or self-employed individual with construction experience to repair your log home. Construction or carpentry experience is a background we look for when hiring Log Master’s Apprentices, but it is not the only experience needed to restore log cabins. Carpentry is a great skill set with a lot of value. Any good carpenter could probably learn how to restore a log cabin with time and education. However, resto...

Via https://logmastersrestorations.com/blog/what-are-the-considerations-for-log-home-restoration-estimates/


source https://johnkbrown90.weebly.com/blog/what-are-the-considerations-for-log-home-restoration-estimates

Tuesday, January 14, 2025

A Log Home Maintenance Checklist for Restoration Estimates


Have you ever wondered what you should be doing to maintain your log home? Or are you looking for a guide to help you decide when to hire a log home restoration company to provide log home maintenance? Either way, Log Masters has the answers! After repairing and restoring log cabins for decades, we have learned the ins and outs of log cabin care. Quick Log Home Maintenance Checklist Before requesting a restoration estimate, we recommend all log homeowners inspect their log home for the following. Throughout the post, we will explore how to perform this maintenance checklist in depth. Rot or Decay: Soft spots, discoloration, or spongy wood on logs Cracks and Checks: Large or upward-facing cracks that may collect water Fading or Staining: Worn or discolored log finishes Sealant Issues: Gaps in chinking or deteriorating caulking around doors and windows Moisture Concerns: Poor roof overhangs, clogged gutters, or improper drainage Insect Damage: Holes, sawdust, or signs of carpenter bees or other pests Overgrown Landscaping: Vegetation or trees touching the logs, trapping moisture Foundation Grading: Ensure water flows away from your home Step 1: Please Check for Log Rot Log rot is a type of decay that occurs when fungi feed on wood. To check for log rot, use a steak skewer (or paint roller stick on a pole for high areas) to poke the logs. Solid logs are safe, but soft logs where the skewer sinks in are not. Note exactly where and how far into the log the skewer goes, then test these same logs to listen for hollow sounds when knocking the side of the log with a hammer. Hollow logs can also be an indicator of log rot. Log rot can appear anywhere on log homes. That being said, we highly recommend all homeowners check the following areas that are more susceptible to log rot: Area surrounding your window and door frames Logs near the ground (especially if the log height above the ground is below a foot) Areas that regularly receive shade Logs around your downspouts Posts or columns on the front or back porches All walls (west and south-facing walls get the most rain, while east and north-facing walls can struggle to dry out) Decks and porches Take notes and photograph any possible signs of log rot you discover. When you submit your estimate request, you can share these images and notes with us. Step 2: Inspect for Cracks and Checks Cracks, also known as checks, naturally occur as logs age and dry. However, larger or upward-facing cracks can trap water, leading to potential decay. Use a flashlight to inspect your logs for cracks closely. As you inspect, make note of any cracks wider than 1/4 inch or deep enough to hold water. Also, pay special attention to cracks facing upward, as they are more likely to collect moisture. When looking for cracks, focus your inspection on these areas: Logs around windows and doors The tops of logs on horizontal surfaces, like railings or porch beams Areas exposed to consistent rainfall or snow accumulation Take photos and measurements of any significant cracks to include with your restoration estimate request. Step 3: Assess for Fading or Stain Failure The finish on your logs protects the wood from UV rays and moisture. Over time, both oil and water-based log home stains can wear away, leading to discoloration or staining. To evaluate your logs, look for uneven color, dullness, or areas where water no longer beads up (a sign the finish is failing). Then, check for dark streaks or spots, which may indicate moisture penetration. As you assess fading and stain issues, pay close attention to: Walls exposed to direct sunlight, especially south- and west-facing sides Logs beneath eaves or overhangs with insufficient coverage Areas near sprinklers or splashback from rain Document areas of fading or staining with photos so our restoration professionals can recommend the appropriate treatment. Step 4: Examine Sealants and Caulking Sealants, including chinking and caulking, protect your log home from air and water infiltration. During your inspection: Look for gaps, cracks, or separations in the chinking between logs. Check caulking around windows, doors, and other seams for signs of wear or detachment. Pay close attention to corners where chinking may pull away. Also, examine window and door frames where caulking might crack. If you notice any sealant failures, document them with photos and a brief description for your estimate request. Step 5: Check Moisture and Drainage Excess moisture is a primary cause of log home issues. To ensure proper moisture control, you should regularly inspect roof overhangs, gutters, and downspouts to ensure all are working properly to direct water away from your log home. Please take photos of any drainage concerns, such as pooling water or clogged gutters, as these can be clear signs your log home requires maintenance. Step 6: Look for Insect Damage Insects like carpenter bees, termites, and wood-boring beetles can damage your log home by tunneling into the wood. Knowing what to look for can help you spot problems early. During your inspection, check for the following signs of insect activity: Small Round Holes Carpenter bees drill perfectly round holes, typically 1/2 inch in diameter, on the undersides of logs, eaves, or porch beams. Powderpost beetles may leave smaller, pin-sized exit holes. Sawdust or Frass Look for piles of fine sawdust (called frass) beneath holes or along logs, which is a sign of carpenter bee or beetle activity. Mud Tubes Termites build small, pencil-sized mud tubes along the foundation or wood surfaces to stay protected while traveling. Tunnels or Galleries in the Wood Check for visible tunnels inside logs, especially if you notice soft or hollow areas. This is often a sign of termite or beetle damage. Woodpecker Damage Unusual damage to your logs, such as holes or stripped bark, might indicate woodpeckers hunting for insects within the wood. Active Insects or Nests Spot live carpenter bees hovering near eaves or logs. Look for insect nests in corners, under porch ceilings, or near downspouts. Step 7: Review Landscaping Concerns Proper landscaping plays a vital role in protecting your log home. To ensure your landscaping isn’t causing issues, look for vegetation, like shrubs or trees, that is too close to the logs and trapping moisture. Check for ivy or other climbing plants that may damage the wood. Finally, ensure the ground slopes away from your home to prevent water from pooling near the foundation. As you walk through this step of your log home maintenance checklist, pay attention to: Trees with overhanging branches Bushes or plants growing within 2 feet of the logs Areas where mulch or soil is piled against the logs Complete Your Log Home Maintenance Checklist with Log Masters Following this checklist is the first step in protecting your log home. Regular maintenance not only ensures the beauty of your home but also helps prevent costly repairs down the road. If you’ve identified any issues during your inspection, don’t wait—contact Log Masters today for a comprehensive restoration estimate. With decades of experience, we’re here to help you restore, repair, and protect your log home for generations. Log Masters offers both online and in-person estimates. Regardless of which method you prefer, please have the following information handy when you contact us to submit your log home maintenance request: Your full name The complete address where your log home is located Your phone number and email address Your preferences on how and when we contact you Notes and photographs about any areas of concern you identified during your log home maintenance inspection Approximate square footage of your log home Environmental obstacles, such as a house over a lake or water Road access problems such as through the mountains or lack of a driveway The more information you can provide, the better we can assist you. If you’ve had a recent home inspection, those are always welcome. Don’t delay; submit an estimate request for log home maintenance and repairs today! The post A Log Home Maintenance Checklist for Restoration Estimates appeared first on Log Home Restoration, Maintenance & Additions | Log Masters.

Via https://logmastersrestorations.com/blog/contact-checklist/


source https://johnkbrown90.weebly.com/blog/a-log-home-maintenance-checklist-for-restoration-estimates

Tuesday, November 12, 2024

The Lodge in the Princeton Mountains October 27 2023


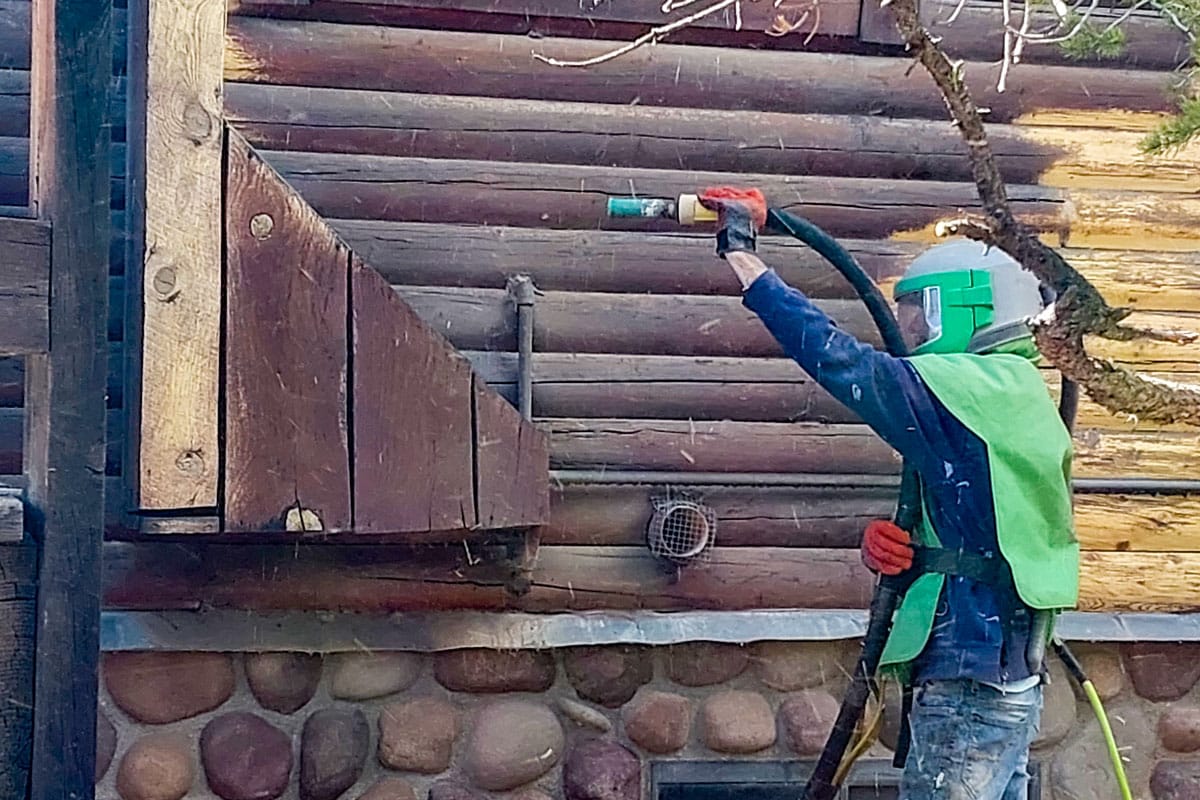
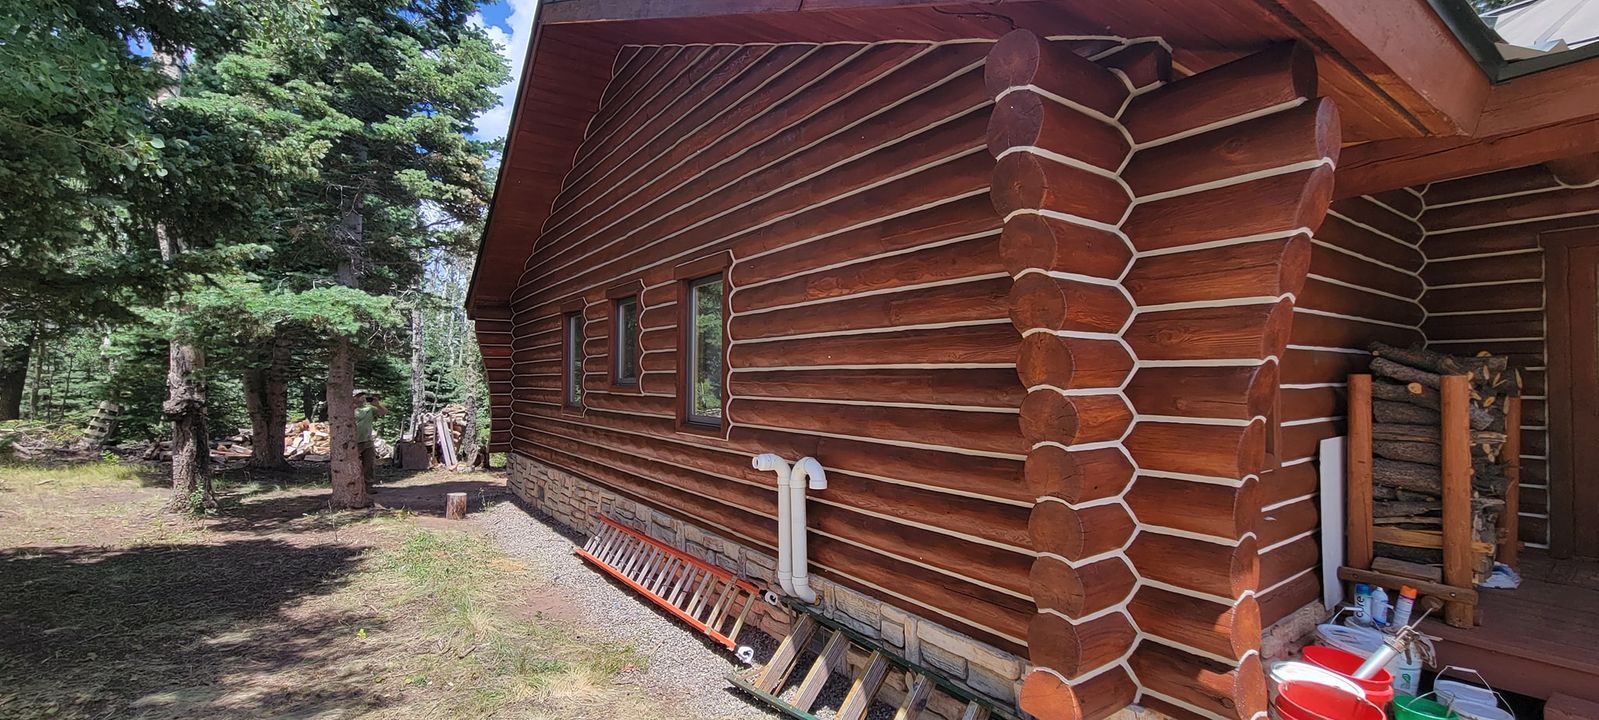
Just finished up this beautiful log home masterpiece! Media blasted, sanded, 100′ logs replaced, Sashco Capture/Cascade stained, picnic table & decks refinished, & chink painted. On October 27, 2023 – See on Facebook This fantastic log home structure took a few months of dedicated work and equipment. We enjoyed the time with the owner and being able to make his home exactly how he wanted it to look. Thank you for sharing on Facebook your pleasure with our services. Look forward to our first maintenance visit in 3 years. The post The Lodge in the Princeton Mountains October 27, 2023 appeared first on Log Home Restoration, Maintenance & Additions | Log Masters.

Via https://logmastersrestorations.com/video/the-lodge-in-the-princeton-mountains-october-27-2023/


source https://johnkbrown90.weebly.com/blog/the-lodge-in-the-princeton-mountains-october-27-2023

Monday, September 16, 2024

Why Subcontractors Partner with Log Masters Restorations


At Log Masters Restorations (LMR), we value our subcontractors’ expertise and offer flexibility and benefits to support your success. Here’s what you can expect when partnering with us: Control Your Schedule No Client Hassles Access To Health Benefits Support For Entrepreneurs Flexibility and Freedom Employment Opportunities Log Masters Restorations offers exciting opportunities for contracting crews to work on high-demand projects. Join us in maintaining top-quality standards while fostering entrepreneurship and growth. Our success stories, like Philemon’s journey from crew member to business owner, inspire the next generation of Log Masters. Table of Contents Be An Industry Leader Why Do Log Home Restoration Companies Hire Subcontractors Control Your Schedule We Handle the Details Our solution Our System No Client Hassles Feeling Overwhelmed Access to Insurance Benefits Support for Entrepreneurs Flexibility and Freedom Employment Opportunities  Be An Industry Leader In today’s log home preservation industry, many professionals prefer to take control of their work by becoming their boss. Subcontracting labor is a common practice among successful log home companies. While we do have a dedicated employee base and provide apprenticeships in the spring, the majority of experienced individuals in this industry prefer to work as 1099 subcontractors. This allows them to set their own work schedule, prioritize family time, take the winter off, and be available for other client projects. Why Do Log Home Restoration Companies Hire Subcontractors That’s a good question and one we asked ourselves. The simple answer is that the construction industry needs help with the labor workforce since few young people are choosing it as a career option. Almost everyone is struggling to find laborers, especially in trade-skill jobs. No one understands the importance of employee retention like those in the log home services business. Button Text Control Your Schedule You’re not an employee, so there is no clock in and out, giving you more freedom over your time. You can choose how many contracts you take on and dictate the terms of your service times. This flexibility allows you to plan family time around work or prioritize more profitable contracts when opportunities arise. Below is an additional explanation: Except where a contract dictates, and you’ve agreed, there are no dictated weekly expectations from 8 to 5, Monday through Friday, set schedules. However, these are often the best times to schedule services since the homeowners are often at work, or it is the general expectation by clients. We try to schedule restorations as soon as possible, as clients are often eager to restore their cabins as soon as possible. You will discuss the scope and amount of each contract before signing an agreement for services as a partner in the contract. You will be expected to finish contracts promptly under the supervision of our Log Masters Project Manager, who will guide you in meeting our LMR Quality Service Expectations. Project Managers will be available for additional training as needed. Example: You can take one contract from us in May, another with someone else, and return in August for another contract—it’s not a problem. Please let us know when you have scheduled openings; we will help you fill them out. We Handle the Details You are one of the most skilled contractors doing log cabin repairs, and you work hard, putting in weekends to respond to potential clients, set up for the next contract, pay taxes, handle financing and legal, marketing, etc. It’s a lot. Initially, you wear multiple hats and can hardly wear them all at once. Nick, founder of Log Masters, and Scott, owner & partner, have experienced this firsthand. If only there were six guys just like you taking care of the stuff you don’t like doing. Search no more because we may have your solution. Our solution We handle all material purchases and deliveries, client communication, and contract management so you can focus on your craftsmanship without distractions. All you’ll need is a bookkeeper to file your taxes, which you probably already have. If you don’t have one, B&C Accounting and Tax, LLC is a great firm that is familiar with log home restoration services and offers very affordable bookkeeping and tax filing services for contractors. Our System One thing we found challenging was juggling all the demands of running a company, as expected by state and federal rules and regulations, while also trying to provide the services. With our system, we handle all the back-end administrative work expected by clients, so you don’t have to. There is no need to play phone tag with potential clients & build detailed contracts only to discover they found someone else who answered the phone and immediately got a contract to them. Your downtime is your downtime again. No Client Hassles Our offices will manage all interactions with customers, neighbors, and vendors, freeing you to focus on what you do best. This was another problem we discovered when making contracts. Juggling customer calls promptly is one thing, but managing several types of communications can be challenging to organize and track. Feeling Overwhelmed It can be overwhelming to manage the business as a whole: collecting debts, paying overhead bills, ensuring contracts are signed and returned, quality-controlling employees’ work, payroll, and taxes, and handling communications from current and future clients. Not to mention all the other hundreds of people who regulate businesses that you’ll need to keep in contact with regularly, such as your lawyer, vendors, state and federal governing agencies, IRS, website team, or marketing team. It can destroy a good service business. We hope our system will benefit your growth. Access to Insurance Benefits Offering dedicated employees benefits like insurance isn’t easy for a small business, making it hard to keep skilled workers. Often, the cost is astronomical or unavailable due to company size. Regardless of your company’s size, you can access AFLAC health supplements and insurance options, including dental, vision, critical care, cancer, life, and short-term disability coverage, through our company & AFLAC at a meager cost. This allows you to secure essential coverage cheaply, providing extra peace of mind for your crew and family and making your employment more attractive. Support for Entrepreneurs If you need help setting up company insurance or your business, we’re here to offer advice! We believe in supporting entrepreneurs and are happy to provide guidance. Our team of managers has years of experience restoring cabins and can deliver your team training as needed upon request. Of course, like our team of Log Masters, we strongly encourage all our contractors to take classes with Perma-Chink Systems and Sashco Inc. to become familiar with their products as we use them the most, if not exclusively. Flexibility and Freedom Whether you want to take on as many contracts as possible or just a few, you can choose what works best for your lifestyle and business needs. If you are skilled in log home restoration and maintenance and willing to follow our quality expectations on contracts, we have plenty of work to keep you busy all summer. Employment Opportunities  If you prefer to be employed by us rather than subcontract, just let us know. We’re always looking for talented individuals to join the Log Masters team! The post Why Subcontractors Partner with Log Masters Restorations appeared first on Log Masters Restorations.

Via https://logmastersrestorations.com/blog/why-subcontractors-partner-with-log-masters-restorations/


source https://johnkbrown90.weebly.com/blog/why-subcontractors-partner-with-log-masters-restorations

The Real Cost of Deferred Maintenance on a Log Cabin Rental Property

Owning a log cabin rental should feel like the perfect investment. It offers guests a peaceful escape, creates a steady income, and showcase...